ゼータ関数の等高線のプロット
ゼータ関数によって実軸上または虚軸上にマッピングされる複素数について考えます。そのような複素数の集合はどのような形をしているでしょうか。幸いなことに現代人にはコンピュータがあります。今回は、既存の Python ライブラリを活用して以下の図を作成しました。

色分けは以下のとおりです。
色違いの曲線が交わる点がゼータ関数の零点になっています。また、クリティカルライン上に非自明な零点が並んでいることがわかります。
プログラム
- mpmath 1.3.0
- Python 3.12.1
import numpy as np
import matplotlib.pyplot as plt
from mpmath import *

fig = plt.figure()
ax = fig.add_subplot(1,1,1)

xmin,xmax=-9,10
ymin,ymax=-8,35

x = np.arange(xmin,xmax,0.1)
y = np.arange(ymin,ymax,0.1)
X, Y = np.meshgrid(x, y)
Z1 = np.zeros(X.shape)
Z2 = np.zeros(X.shape)

for i in range(X.shape[0]):
    for k in range(X.shape[1]):
        z = zeta(X[i][k]+Y[i][k]*1j)
        Z1[i][k] = re(z)
        Z2[i][k] = im(z)

ax.set_xlim(xmin,xmax)
ax.set_ylim(ymin,ymax)
ax.grid()
ax.contour(X, Y, Z1,colors='#5ec962')
ax.contour(X, Y, Z2,colors='#482878')
ax.plot([0.5,0.5],[ymin,ymax],'--')
plt.show()
TeXworks Editor にダークテーマを導入したい
はじめに
Texworks Editor をを白い背景のまま使うのはシンドイので、以下のQAを参考に背景色を変更します。
https://tex.stackexchange.com/questions/383271/how-can-i-set-a-dark-theme-in-texworks
環境
OS : Windows 10
TeXworks : 0.6.9
設定手順
まずは以下のファイルを作成し、mystyle.cssとして保存します。保存先は自由に決めてください。
QTextEdit {
    background-color: black;
    color: white;
}
TeXworks Editor のショートカットのある場所を開きます。
右クリックでプロパティを選択します。
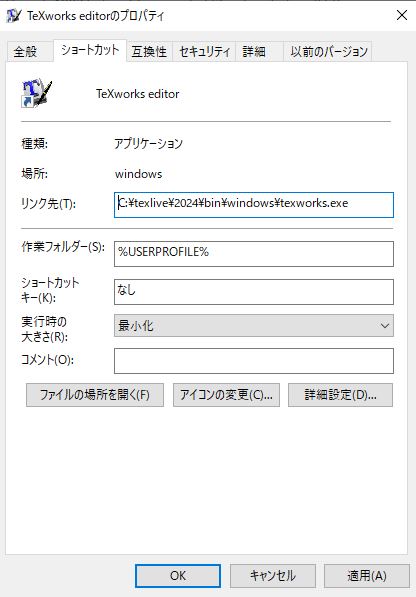
リンク先の欄を以下のように修正し、適用ボタンを押します。mystyle.css の保存先に応じてパスを変更してください。
C:\texlive\2024\bin\windows\texworks.exe -stylesheet C:\path\to\mystyle.css
プロパティ画面を閉じ、TeXworks Editor を開きます。

ダークモードっぽい画面にできました。
Maxima を Windows10 にインストールする
1.ファイルのダウンロード
公式サイトの記述にしたがい、インストールを行います。
https://maxima.sourceforge.io/windows-install.html
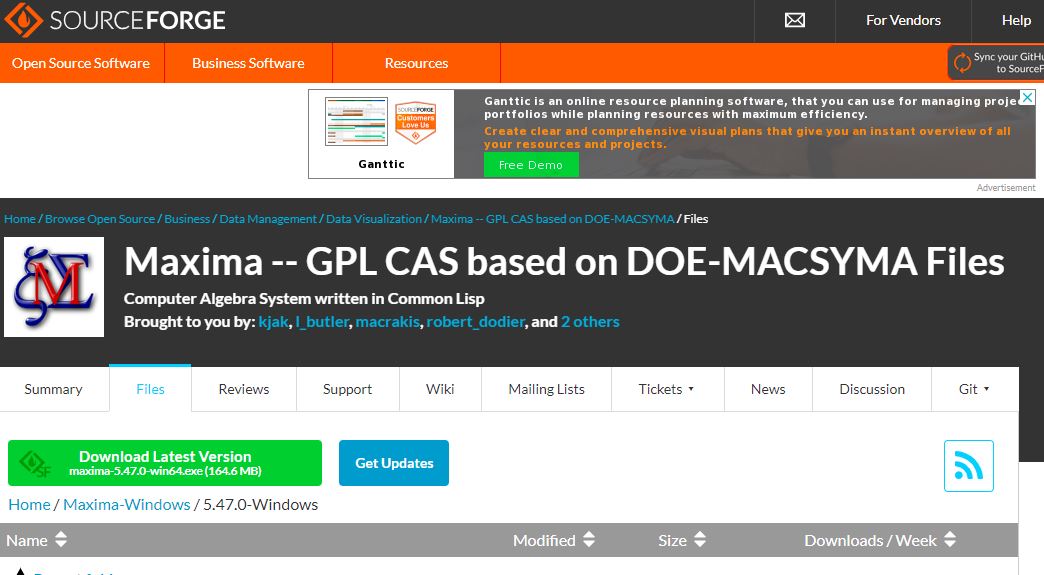
2024年3月3日時点での安定版であるバージョン5.47.0をダウンロードします。
https://sourceforge.net/projects/maxima/files/Maxima-Windows/5.47.0-Windows/
緑のボタンを押すとダウンロードが始まります。
3.セットアップ画面の操作
次へボタンを押します。

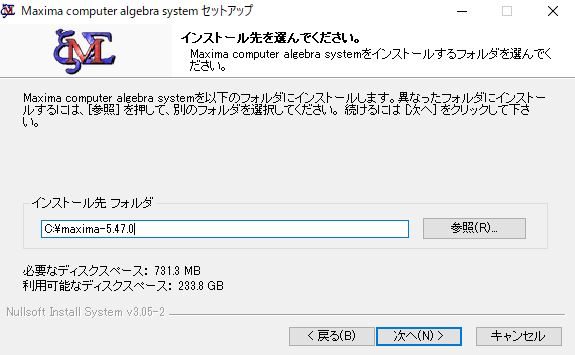
インストールフォルダを選びます。
そのまま次へ進みます。

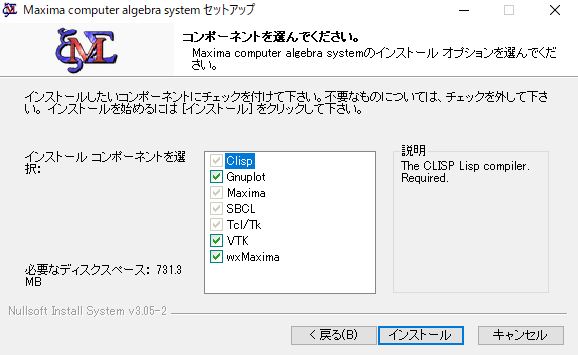
特にチェックは外さず、インストールボタンを押します。
数分程度でインストールが完了します。

4.アプリを起動する
インストールされたフォルダ内の bin を開き、wxmaxima.exe をダブルクリックします。

5.プロットしてみる
maxima が起動したら試しに放物線をプロットします。
以下のコードを貼り付け、Shift+Enterを押します。
plot2d(x^2,[x,-1,1]);

結果は以下のとおりです。

PARI/GP を Windows10 にインストールする

2.ダウンロードしたファイルを実行する
下記の警告が表示されるが無視して実行ボタンを押す。

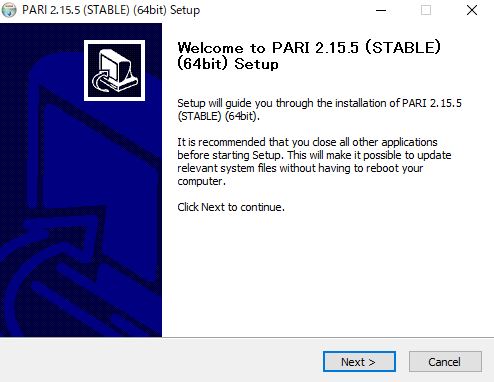
3.セットアップ画面が立ち上がる。Nextボタンを押す。
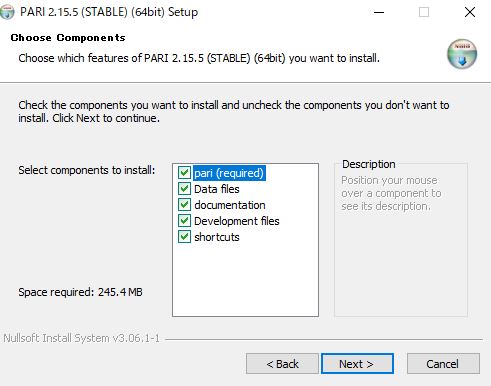
4.インストールしたいものを選ぶ。
ディスクスペースを対してとらないので、すべてにチェックを入れたまま次へ進む。
5.インストールするフォルダを選ぶ。


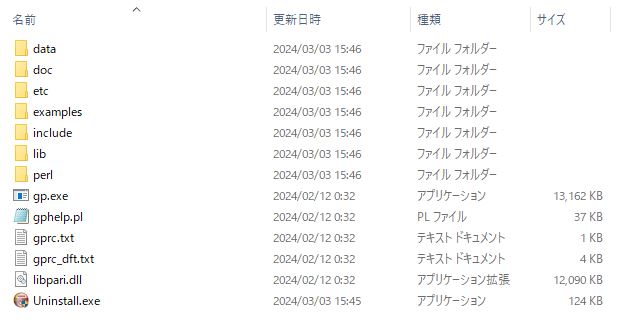
7. gp.exeを起動する。

hiredisをソースからインストールする
前回 Redis をインストールしたので今回は hiredis をインストールします。
環境
$ cat /etc/issue
Ubuntu 22.04.3 LTS \n \l
インストール
ソースを持ってきます。
$ git clone https://github.com/redis/hiredis.git
make します。
$ cd hiredis/
$ make
make install します。
$ sudo make install
[sudo] password for (省略):
mkdir -p /usr/local/include/hiredis /usr/local/include/hiredis/adapters /usr/local/lib
cp -pPR hiredis.h async.h read.h sds.h alloc.h sockcompat.h /usr/local/include/hiredis
cp -pPR adapters/*.h /usr/local/include/hiredis/adapters
cp -pPR libhiredis.so /usr/local/lib/libhiredis.so.1.2.1-dev
cd /usr/local/lib && ln -sf libhiredis.so.1.2.1-dev libhiredis.so && ln -sf libhiredis.so.1.2.1-dev libhiredis.so.1
cp -pPR libhiredis.a /usr/local/lib
mkdir -p /usr/local/lib/pkgconfig
cp -pPR hiredis.pc /usr/local/lib/pkgconfig
デフォルトでは /usr/local/lib および /usr/local/include に必要なファイルが作成されます。
サンプルプログラムの実行
hiredis/example ディレクトリにある example.c を動かしてみます。
コンパイル
$ gcc example.c -I/usr/local/include/hiredis -lhiredis
実行します。
$ ./a.out
./a.out: error while loading shared libraries: libhiredis.so.1.2.1-dev: cannot open shared object file: No such file or directory
共有ライブラリがないぞと怒られました。
エラー解決
実行ファイルが利用する共有ライブラリを調べてみます。
参考:第29回 共有ライブラリと依存関係[1] | gihyo.jp
$ ldd a.out
        linux-vdso.so.1 (0x00007ffeb69be000)
        libhiredis.so.1.2.1-dev => not found
        libc.so.6 => /lib/x86_64-linux-gnu/libc.so.6 (0x00007fd64cb8c000)
        /lib64/ld-linux-x86-64.so.2 (0x00007fd64cdc4000)
hiredisの共有ライブラリだけ not found と表示されています。
環境変数を使って共有ライブラリのパスを指定します
$ export LD_LIBRARY_PATH=/usr/local/lib
参考:Linuxで共有ライブラリの作成とダイナミックリンクをする方法: 小粋空間
もう一度 ldd コマンドで調べます。
$ ldd a.out
        linux-vdso.so.1 (0x00007fffb5954000)
        libhiredis.so.1.2.1-dev => /usr/local/lib/libhiredis.so.1.2.1-dev (0x00007f0615d8a000)
        libc.so.6 => /lib/x86_64-linux-gnu/libc.so.6 (0x00007f0615b59000)
        /lib64/ld-linux-x86-64.so.2 (0x00007f0615da7000)
not foundの表示が消えました。
改めて実行する
$ ./a.out
Connection error: Connection refused
共有ライブラリのエラーは消えましたが、Connection refused と表示されました。
redisが動いているか確認します。
$ redis-cli ping
Could not connect to Redis at 127.0.0.1:6379: Connection refused
サーバを起動します。
$ redis-server &
[1] 67300
(省略)
再度実行します。
$ ./a.out
PING: PONG
SET: OK
SET (binary API): OK
GET foo: hello world
INCR counter: 1
INCR counter: 2
0) element-9
1) element-8
2) element-7
3) element-6
4) element-5
5) element-4
6) element-3
7) element-2
8) element-1
9) element-0
RPUSH reply: 10
サンプルを正常に動かすことができました。
サーバを終了させます。
$ redis-cli shutdown
67300:M 21 Sep 2023 07:51:34.970 * User requested shutdown...
67300:M 21 Sep 2023 07:51:34.970 * Saving the final RDB snapshot before exiting.
67300:M 21 Sep 2023 07:51:34.973 * DB saved on disk
67300:M 21 Sep 2023 07:51:34.973 # Redis is now ready to exit, bye bye...
[1]+  Done                    redis-server
共有ライブラリが見つからなかったときの対処
①環境変数の設定
今回は環境変数の設定で共有ライブラリの問題を解決しましたが、毎回 export と唱えるわけにはいかないので bash_profile に書いておきます。
$ emacs ~/.bash_profile
下記のとおり記述します。
export LD_LIBRARY_PATH=/usr/local/lib
設定を反映させます。
$ source ~/.bash_profile
②confファイルの作成
/etc/ld.so.conf.d/配下に設定を書き、ldconfigを実行するという方法もあるようです。筆者の環境では下記のとおり、3つの設定ファイルがすでにありました。
$ ls /etc/ld.so.conf.d
fakeroot-x86_64-linux-gnu.conf  libc.conf  x86_64-linux-gnu.conf
ここにもう一つhiredis.confといった名前の設定ファイルを追加してldconfigするというのが選択肢の1つとなります。bash_profileに追記するという方法をとったので、今回はhiredis.confの作成はしていません。
参考
③LDFLAGを使う
コンパイル時にLDFLAGを指定する方法もあるようです。hiredis のコンパイル時にこの方法を使うことも可能だと思われますが、再度コンパイルするのが面倒だったので今回は試しておりません。
参考:Linux: ライブラリの動的リンクでエラーが出た場合の対処方法
まとめ
以上でC言語からredisを利用できるようになりました。
Redis をソースからインストールする
環境
$ cat /etc/issue
Ubuntu 22.04.3 LTS \n \l
インストール
ダウンロード
下記参考にソースをダウンロードします。
Install Redis from Source | Redis
$ wget https://download.redis.io/redis-stable.tar.gz
--2023-09-20 19:12:43--  https://download.redis.io/redis-stable.tar.gz
Resolving download.redis.io (download.redis.io)... 45.60.125.1
Connecting to download.redis.io (download.redis.io)|45.60.125.1|:443... connected.
HTTP request sent, awaiting response... 200 OK
Length: 3477351 (3.3M) [application/octet-stream]
Saving to: 'redis-stable.tar.gz'

redis-stable.tar.gz      100%[==================================>]   3.32M  --.-KB/s    in 0.05s
2023-09-20 19:12:44 (70.1 MB/s) - 'redis-stable.tar.gz' saved [3477351/3477351]
解凍
$ tar -xzvf redis-stable.tar.gz
redis-stable/
redis-stable/src/
redis-stable/src/geohash.h
redis-stable/src/redis-trib.rb
redis-stable/src/t_string.c
(省略)
ビルド
make します。
$ cd redis-stable
redis-stable$ make
一応 make test しておきます。
redis-stable$ make test
(省略)
\o/ All tests passed without errors!
(省略)
管理者権限で make install します。
redis-stable$ sudo make install
cd src && make install
(省略)

Hint: It's a good idea to run 'make test' ;)

    INSTALL redis-server
    INSTALL redis-benchmark
    INSTALL redis-cli
(省略)
インストールされたものを確認します。
redis-stable$ ls /usr/local/bin/
redis-benchmark  redis-check-aof  redis-check-rdb  redis-cli  redis-sentinel  redis-server
起動とシャットダウン
バージョン確認
$ redis-server -v
Redis server v=7.2.1 sha=00000000:0 malloc=jemalloc-5.3.0 bits=64 build=fce2f1bf15001fdc
$ redis-cli -v
redis-cli 7.2.1
サーバの起動
$ redis-server &
[1] 52809
(省略):~$ 52809:C 20 Sep 2023 21:08:37.630 # WARNING Memory overcommit must be enabled! Without it, a background save or replication may fail under low memory condition. Being disabled, it can also cause failures without low memory condition, see https://github.com/jemalloc/jemalloc/issues/1328. To fix this issue add 'vm.overcommit_memory = 1' to /etc/sysctl.conf and then reboot or run the command 'sysctl vm.overcommit_memory=1' for this to take effect.
52809:C 20 Sep 2023 21:08:37.631 * oO0OoO0OoO0Oo Redis is starting oO0OoO0OoO0Oo
52809:C 20 Sep 2023 21:08:37.631 * Redis version=7.2.1, bits=64, commit=00000000, modified=0, pid=52809, just started
52809:C 20 Sep 2023 21:08:37.631 # Warning: no config file specified, using the default config. In order to specify a config file use redis-server /path/to/redis.conf
52809:M 20 Sep 2023 21:08:37.632 * Increased maximum number of open files to 10032 (it was originally set to 1024).
52809:M 20 Sep 2023 21:08:37.632 * monotonic clock: POSIX clock_gettime
                _._
           _.-``__ ''-._
      _.-``    `.  `_.  ''-._           Redis 7.2.1 (00000000/0) 64 bit
  .-`` .-```.  ```\/    _.,_ ''-._
 (    '      ,       .-`  | `,    )     Running in standalone mode
 |`-._`-...-` __...-.``-._|'` _.-'|     Port: 6379
 |    `-._   `._    /     _.-'    |     PID: 52809
  `-._    `-._  `-./  _.-'    _.-'
 |`-._`-._    `-.__.-'    _.-'_.-'|
 |    `-._`-._        _.-'_.-'    |           https://redis.io
  `-._    `-._`-.__.-'_.-'    _.-'
 |`-._`-._    `-.__.-'    _.-'_.-'|
 |    `-._`-._        _.-'_.-'    |
  `-._    `-._`-.__.-'_.-'    _.-'
      `-._    `-.__.-'    _.-'
          `-._        _.-'
              `-.__.-'

52809:M 20 Sep 2023 21:08:37.635 * Server initialized
52809:M 20 Sep 2023 21:08:37.635 * Ready to accept connections tcp
プロセスの確認
$ ps
    PID TTY          TIME CMD
  52788 pts/0    00:00:00 bash
  52809 pts/0    00:00:00 redis-server
  52814 pts/0    00:00:00 ps
サーバから返答があるか確認する
$ redis-cli ping
PONG
サーバを終了する
$ redis-cli shutdown
52809:M 20 Sep 2023 21:09:03.298 * User requested shutdown...
52809:M 20 Sep 2023 21:09:03.298 * Saving the final RDB snapshot before exiting.
52809:M 20 Sep 2023 21:09:03.301 * DB saved on disk
52809:M 20 Sep 2023 21:09:03.301 # Redis is now ready to exit, bye bye...
[1]+  Done                    redis-server
プロセスの確認
$ ps
    PID TTY          TIME CMD
  52788 pts/0    00:00:00 bash
  52817 pts/0    00:00:00 ps
Visual Studio で cpp-httplib のサンプルプログラムを動かす
GitHub - yhirose/cpp-httplib: A C++ header-only HTTP/HTTPS server and client library
cpp-httplib はヘッダーファイルのみの HTTP/HTTPS ライブラリです。本記事では本家サイトにあるサンプルを動かすことを目標とします。
0.環境
OS : WIndows 10
IDE : Microsoft Visual Studio Community 2019 Version 16.8.4
README には
NOTE: cpp-httplib officially supports only the latest Visual Studio. It might work with former versions of Visual Studio, but I can no longer verify it. Pull requests are always welcome for the older versions of Visual Studio unless they break the C++11 conformance.
NOTE: Windows 8 or lower, Visual Studio 2013 or lower, and Cygwin on Windows are not supported.
と書いてありますので OS や IDE が古い方はご注意ください。
1.プログラム
本家サイトにあるサンプルプログラムは下記の通りです。今回はWindowsで動かすのでヘッダー部分は書き換えておきます。
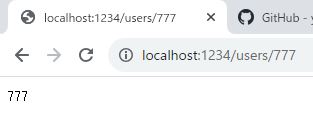
#include "httplib.h"
#include <Windows.h>

int main(void)
{
  using namespace httplib;

  Server svr;

  svr.Get("/hi", [](const Request& req, Response& res) {
    res.set_content("Hello World!", "text/plain");
  });

  // Match the request path against a regular expression
  // and extract its captures
  svr.Get(R"(/numbers/(\d+))", [&](const Request& req, Response& res) {
    auto numbers = req.matches[1];
    res.set_content(numbers, "text/plain");
  });

  // Capture the second segment of the request path as "id" path param
  svr.Get("/users/:id", [&](const Request& req, Response& res) {
    auto user_id = req.path_params.at("id");
    res.set_content(user_id, "text/plain");
  });

  // Extract values from HTTP headers and URL query params
  svr.Get("/body-header-param", [](const Request& req, Response& res) {
    if (req.has_header("Content-Length")) {
      auto val = req.get_header_value("Content-Length");
    }
    if (req.has_param("key")) {
      auto val = req.get_param_value("key");
    }
    res.set_content(req.body, "text/plain");
  });

  svr.Get("/stop", [&](const Request& req, Response& res) {
    svr.stop();
  });

  svr.listen("localhost", 1234);
}
ヘッダーファイル httplib.h は Github ページからダウンロードして、上記のファイルと同じディレクトリに置きます。Visual Studio 上では次のような構成になります。

2.ビルドと実行結果
「ソリューションのビルド」「デバッグなしで開始」を押下します。何も表示されていないコンソールが立ち上がると思います。コンソールは無視して localhost にアクセスしてみましょう。


2.5.停止
上記 URL にアクセスするとコンソールにメッセージが表示されます。

サーバーが停止しているので Hello world を表示させようとしても次のような画面が表示されます。

サンプルプログラムを動きを確認できたので今回は以上です。